MLPoweredSeleniumJavaPOC
This project demonstrates the integration of Healenium, a machine-learning-powered library, with Selenium for efficient regression testing by addressing issues caused by minor web locator changes.
This proof of concept project showcases the integration of Healenium into a Maven Java Selenium project. It highlights how machine learning capabilities can be integrated into Selenium, addressing the problem of test failures due to small changes in web locators. The project is designed to make regression testing more robust and less prone to false negatives.
- Healenium: Healenium is an open-source library that enhances Selenium-based UI tests by providing self-healing capabilities. It identifies elements that were not found during test execution and attempts to locate them using alternative locators.
- Benefits: Healenium reduces maintenance efforts required for Selenium UI tests and minimizes false-negative results due to outdated locators.
- Setup: The project combines a Selenium project, an Angular project to test, and Healenium as a Maven dependency.
- Project Description
- Key Points
- How to Install and Run the Project
- How to Use the Project
- DEMO
- Summary
To install and run the project, follow these steps:
Clone down the solution to your local machine. Note the solution contains two projects. Angular application and Selenium test project. Healenium is already installed as a Maven dependency. You will need to spin up containers that contain Healenium backend. See instructions below on how to do that.
Healenium consists of a Maven Healenium dependency and docker backend. More information on these components can be found below:
Maven dependency
https://github.com/healenium/healenium-web
https://mvnrepository.com/artifact/com.epam.healenium/healenium-web
Docker backend
https://github.com/healenium/healenium-backend
https://hub.docker.com/search?q=healenium
Navigate to my-angular.app folder and run the following command in the terminal to start Angular dev server on localhost http://localhost:4200
ng serve --open
The command "ng serve --open" is used in Angular development to start a local development server and automatically open a web browser to preview your Angular application. Here's a brief explanation:
1. **ng serve:** This part of the command is used to start the Angular CLI's development server. It compiles your Angular application's code, bundles it, and makes it available for testing and development.
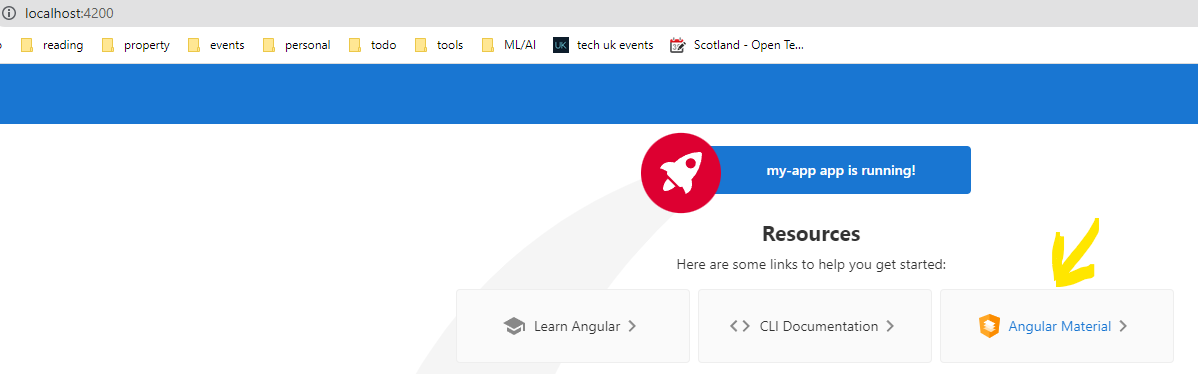
2. **--open:** This flag is an optional parameter that instructs the Angular CLI to automatically open a web browser. When you run "ng serve --open," it launches a default web browser, which then loads your Angular app.Upon successfull build of the Angular application, you should see the following page on http://localhost:4200/

Navigate to infra folder in the JavaHealeniumPOC in the terminal and run the following command to download images and spin up containers
infra folder is found here where docker compose file is located

docker command to run
docker-compose up -d
The Docker command "docker-compose up -d" is used to start containers defined in a Docker Compose configuration file in detached mode. Here's a brief explanation:
1. **docker-compose:** This command is part of Docker Compose, a tool for defining and running multi-container Docker applications. It reads the configuration from a "docker-compose.yml" file in your project directory.
2. **up:** The "up" command tells Docker Compose to create and start containers defined in the Compose file. It ensures that your defined services, networks, and volumes are launched and configured as specified in the Compose configuration.
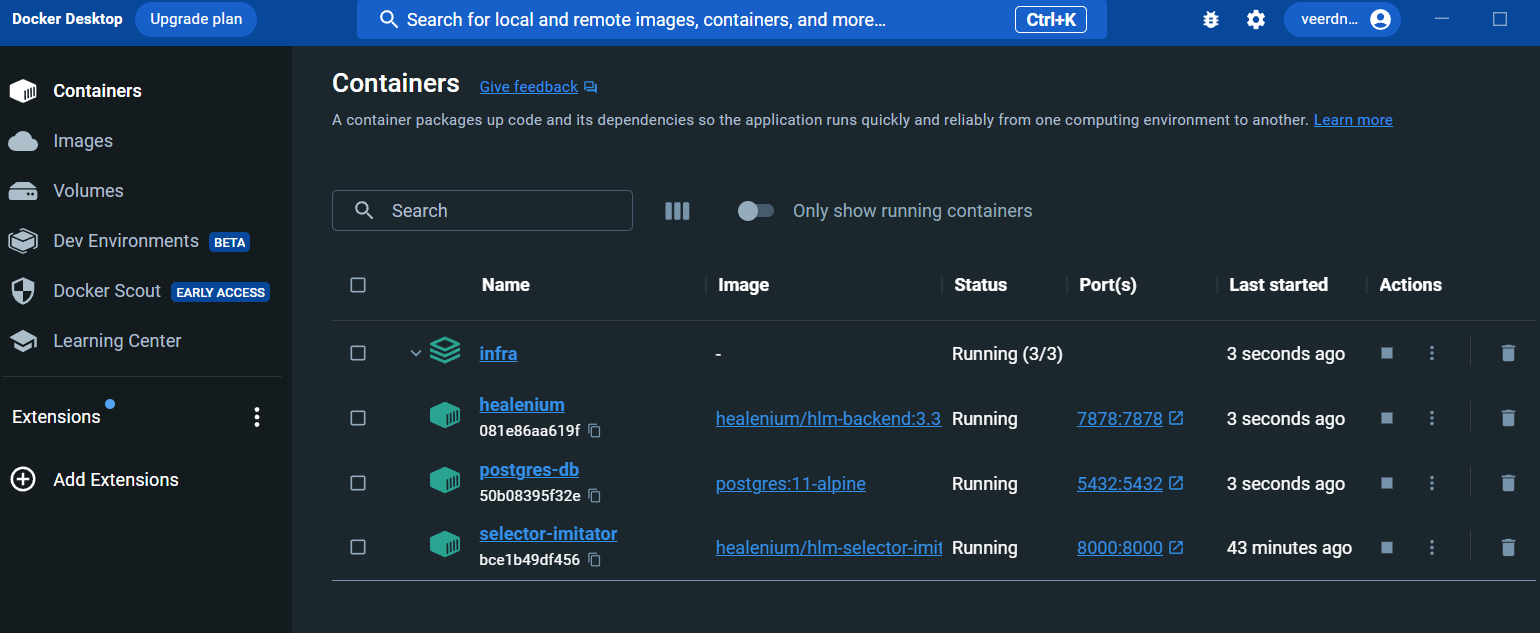
3. **-d:** The "-d" flag stands for "detached" mode. When you use this flag, Docker Compose starts the containers in the background, and the command prompt is returned to you immediately. This means you can continue using the terminal for other tasks without being attached to the container's logs.To verify that you have all the expected containers running successfuly you can run "docker ps" command in the terminal and see the following output

Alternatily open docker desktop and navigate to containers where you should see the following list of running containers under infra

The POC demonstrates how Healenium can handle changes in web locators to prevent test failures.
-
Ensure that you have a baseline snapshot of the elements. To do this, run the test once to save a snapshot of the elements used during the test.
-
In the Angular project, change the ID of an element, simulating a locator change.
-
Run the test with the changed locator to observe how the self-healing capability works. With Healenium enabled, the test should pass by healing the web element locator.
-
You can verify the self-healing by visiting http://localhost:7878/healenium/report/, where you'll find a report and a screenshot of the healed web element.
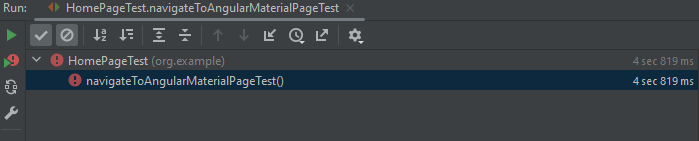
The id that my navigateToAngularMaterialPageTest is using to click on the button that takes me to a new tab has been changed and this will normally make my test fail with no element found exception. The web element itself hasn't changed but because the id has been changed it will make the tests that rely on it to fail resulting in a failed regression test.
To simulate this scenario, firstly you need to run the test at least once when it passes to enable Healenium to save a snapshot of the elements on the page to a Postgres DB. In this scenario the web locators in the Selenium project and the angular application must match. This baseline snapshot image will be used in subsequent test runs to heal elements that face element not found exceptions.
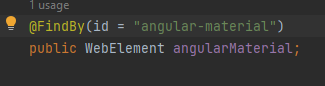
Selenium project
public class HomePage {
private SelfHealingDriver driver;
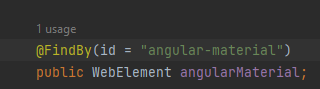
@FindBy(id = "angular-material")
public WebElement angularMaterial;
public HomePage(SelfHealingDriver driver) {
this.driver = driver;
PageFactory.initElements(driver, this);
}
}Angular project
 <a class="card" target="_blank" rel="noopener" href="https://material.angular.io" id="angular-material">
      <svg xmlns="http://www.w3.org/2000/svg" style="margin-right: 8px" width="21.813" height="23.453" viewBox="0 0 179.2 192.7"><path fill="#ffa726" d="M89.4 0 0 32l13.5 118.4 75.9 42.3 76-42.3L179.2 32 89.4 0z"/><path fill="#fb8c00" d="M89.4 0v192.7l76-42.3L179.2 32 89.4 0z"/><path fill="#ffe0b2" d="m102.9 146.3-63.3-30.5 36.3-22.4 63.7 30.6-36.7 22.3z"/><path fill="#fff3e0" d="M102.9 122.8 39.6 92.2l36.3-22.3 63.7 30.6-36.7 22.3z"/><path fill="#fff" d="M102.9 99.3 39.6 68.7l36.3-22.4 63.7 30.6-36.7 22.4z"/></svg>
      <span>Angular Material</span>
      <svg class="material-icons" xmlns="http://www.w3.org/2000/svg" width="24" height="24" viewBox="0 0 24 24"><path d="M10 6L8.59 7.41 13.17 12l-4.58 4.59L10 18l6-6z"/></svg>
    </a>
To verify that the baseline snapshot of the elements that Selenium interacts with has been saved correctly, you can navigate to this url http://localhost:7878/healenium/selectors/ where you should see the following:

Secondly, you need to navigate to app.component.html class in my-angular-app, change the id for the element below from angular-material to react material. Save this code change. Angular normally does a live reload and your id change is reflected immediatly in localhost. However it is a good idea to inspect the element in dev tools to make sure the change has been reflected in the localhost as expected before continuing.
Before the change
 <a class="card" target="_blank" rel="noopener" href="https://material.angular.io" id="angular-material">
      <svg xmlns="http://www.w3.org/2000/svg" style="margin-right: 8px" width="21.813" height="23.453" viewBox="0 0 179.2 192.7"><path fill="#ffa726" d="M89.4 0 0 32l13.5 118.4 75.9 42.3 76-42.3L179.2 32 89.4 0z"/><path fill="#fb8c00" d="M89.4 0v192.7l76-42.3L179.2 32 89.4 0z"/><path fill="#ffe0b2" d="m102.9 146.3-63.3-30.5 36.3-22.4 63.7 30.6-36.7 22.3z"/><path fill="#fff3e0" d="M102.9 122.8 39.6 92.2l36.3-22.3 63.7 30.6-36.7 22.3z"/><path fill="#fff" d="M102.9 99.3 39.6 68.7l36.3-22.4 63.7 30.6-36.7 22.4z"/></svg>
      <span>Angular Material</span>
      <svg class="material-icons" xmlns="http://www.w3.org/2000/svg" width="24" height="24" viewBox="0 0 24 24"><path d="M10 6L8.59 7.41 13.17 12l-4.58 4.59L10 18l6-6z"/></svg>
    </a>
After the change
 <a class="card" target="_blank" rel="noopener" href="https://material.angular.io" id="react-material">
      <svg xmlns="http://www.w3.org/2000/svg" style="margin-right: 8px" width="21.813" height="23.453" viewBox="0 0 179.2 192.7"><path fill="#ffa726" d="M89.4 0 0 32l13.5 118.4 75.9 42.3 76-42.3L179.2 32 89.4 0z"/><path fill="#fb8c00" d="M89.4 0v192.7l76-42.3L179.2 32 89.4 0z"/><path fill="#ffe0b2" d="m102.9 146.3-63.3-30.5 36.3-22.4 63.7 30.6-36.7 22.3z"/><path fill="#fff3e0" d="M102.9 122.8 39.6 92.2l36.3-22.3 63.7 30.6-36.7 22.3z"/><path fill="#fff" d="M102.9 99.3 39.6 68.7l36.3-22.4 63.7 30.6-36.7 22.4z"/></svg>
      <span>Angular Material</span>
      <svg class="material-icons" xmlns="http://www.w3.org/2000/svg" width="24" height="24" viewBox="0 0 24 24"><path d="M10 6L8.59 7.41 13.17 12l-4.58 4.59L10 18l6-6z"/></svg>
    </a>
Element under test
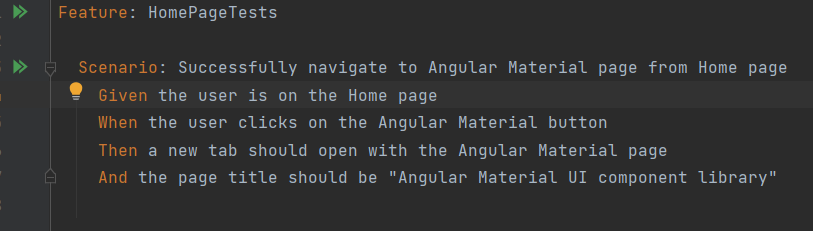
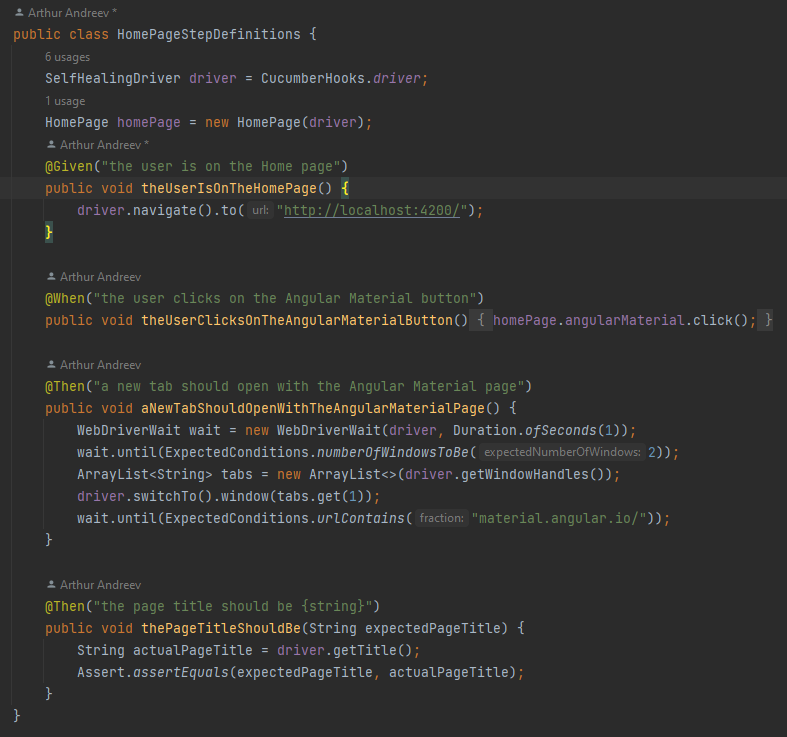
Test case

Angular

Selenium
Docker
Non matching locator(#react-material in Angular vs #angular-material in Selenium) AND self healing capability is switched OFF. Test fails with no such element exception.
Id is changed in the Angular project from #angular-material to #react-material


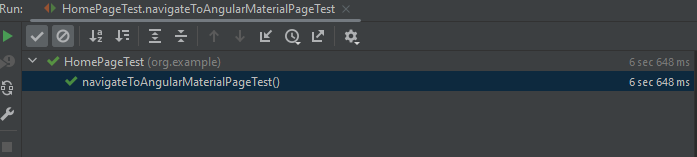
Non matching locator(#react-material in Angular vs #angular-material in Selenium) AND self healing capability is switched ON. Test passes.
Screenshot of the healed web element

Screenshots of all the healed elements can be found in this folder ..\SeleniumWithSelfHealingCodeGen\infra\screenshots
Verify that the element has been healed successfully by navigating to http://localhost:7878/healenium/report/ where you will see the following report along with a screenshot of the healed web element

With the standard Selenium implementation my test will fail in this scenario. With Healenium wrapper on top of WebDriver, it catches NoSuchElement exception, triggers the LSC algorithm, passes the current page state, gets previous successful locator path, compares them, and generates the list of healed locators. From this list, Healenium selects the locator with the highest score and proceeds to perform an action using this locator. Upon test completion, Healenium compiles a comprehensive report. This report contains detailed information about the healed locator, includes a screenshot illustrating the successful healing process, and offers a feedback button for users to provide insights on the healing success.
More information on how to wrap WebDriver with Healenium can be found in WebDriverFactory class

More information on Healenium can be found here - https://healenium.io/docs/how_healenium_works
More information on the LSC algorithm can be found here - https://www.geeksforgeeks.org/longest-common-subsequence-dp-4/
Last thing to note is that Healenium needs a healenium.properties file in your solution where you configure its settings. Below is the healenium.properties file I have in my solution with explanation of each line.
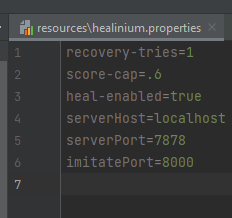
- recovery-tries=1: This line indicates the number of attempts Healenium should make to locate a missing element using its self-healing mechanism.
- score-cap=.6: This sets the minimum similarity score (between 0 and 1) required for an alternative locator to be considered a match. The value of 0.6 means that Healenium will only consider locators with a similarity score of 60% or higher.
- heal-enabled=true: This line enables or disables Healenium's self-healing feature. When set to true, Healenium's self-healing capabilities will be active.
- serverHost=localhost: This line specifies the server host for the Healenium backend service. In this case, it is set to localhost, meaning the service will run on the same machine as the tests.
- serverPort=7878: This line defines the port on which the Healenium backend service will listen. Here, it is set to port 7878.
- imitatePort=8000: This line sets the port used for communication between the Healenium backend service and the client (Selenium tests). In this case, it is set to port 8000.
Healenium offers a valuable solution for Selenium automation projects, significantly reducing maintenance work and addressing the common issue of failing regression tests due to minor web locator changes. It's a powerful tool for making your test automation more robust and efficient, allowing you to focus on creating tests for new features rather than constantly fixing failing regression tests. Explore Healenium further to harness its full capabilities and enhance your test automation processes.